Exporting Analytics to Cloud Storage
You can export your analytics on a scheduled or ad hoc basis.
Written By El
Last updated About 1 month ago
Your development team is likely the best equipped to set up this export.
Step 1: Configure Your Storage Integration
Users with Admin access can configure store integrations for your CADdetails and Design Hub Analytics exports.
Add an external storage integration that uses a customer-owned bucket in Amazon S3, Google Cloud Storage (GCS), or Azure Blob Storage. This storage integration supports the following features:
CSV upload
File upload column in input tables
Export to cloud storage
In your cloud provider, you must be granted administrative permissions or have the ability to create and manage a storage bucket.
Supported cloud providers are:
Amazon Web Services (AWS) (other S3-compatible providers are not supported)
Google Cloud Platform (GCP)
Microsoft Azure
In your cloud provider, you must also be granted permissions required to create and manage core security policies (e.g., IAM roles, ARN definitions, or trust policies).
Step 2: Navigate to Export Feature
Click on the export and follow User Guide instructions to initiation an ad hoc or scheduled export CADdetails Analytics User Guide - Prodify
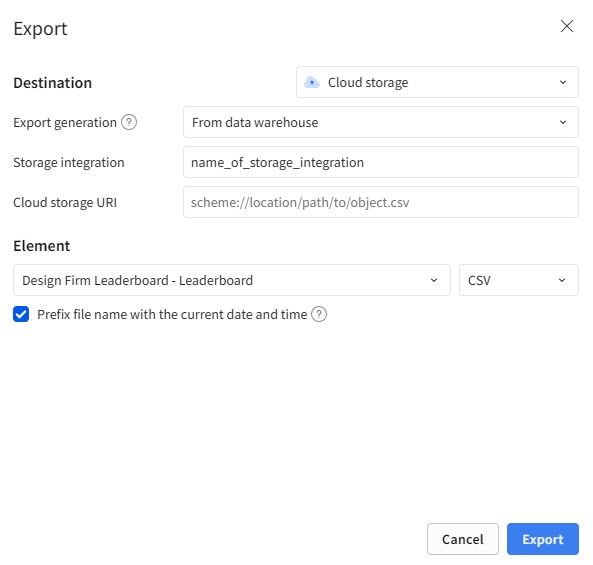
Step 3: Format a Target File Path
For Destination, select Cloud Storage
For Export Generation, select “From data warehouse”
Give it a name (Storage Integration)
Give it a destination (Cloud Storage URI)
Format a cloud storage destination URI
For both Snowflake and Redshift connections, the destination URI represents the target file path for your export in your cloud storage service.
Use the following template to format your URI:
<schema>://<bucket>/<filepath>/<filename><filetype><compression>Where:
Schema: The export destination. Specify “s3” if exporting to AWS S3, “gcs” if exporting to GCS, and "azure" if exporting to Azure.
Bucket: The highest level storage object supported by the cloud storage provider. Your S3 bucket, GCS bucket, or Azure container.
File path (optional): Target subdirectories in the bucket or container. If you do not specify a file path, exported files are added directly to the root.
File name: A file name to use for the exported file.
File type: The file format for the exported file. Must be
.csv.Compression (optional): A compression option for the exported file. Can only be
.gz.
An example destination URI is:
s3://my-sigma-bucket/cloud-exports/sales.csv.gzIf your URI is identical to an existing file in the bucket, the existing file is overwritten.
Format an external stage URI
If you are using an external stage, use the following template to format your URI:
@<database>.<schema>.<stage_name><filename><filetype><compression>This template follows the convention for fully-qualified stage names in Snowflake, with the addition of the
@character at the beginning of the name.
Pick an appropriate export element
If a scheduled export, configure your export to align with data refresh (weekly) or your preference
Step 4: Export Your Data
You can export to cloud storage on an ad hoc or scheduled basis. For detailed instructions on how to set up ad hoc or scheduled exports, please refer to our User Guide CADdetails Analytics User Guide - Prodify